Business Flow Quick Start
Business Flow is a workflow application designed for batch processing scenarios. It is suitable for building one-time automated tasks such as document processing, content generation, and data transformation.
This tutorial will guide you from scratch to build a Document Content Processor: receive a document uploaded by the user, automatically extract the text content, process it through a large language model, and output the result.
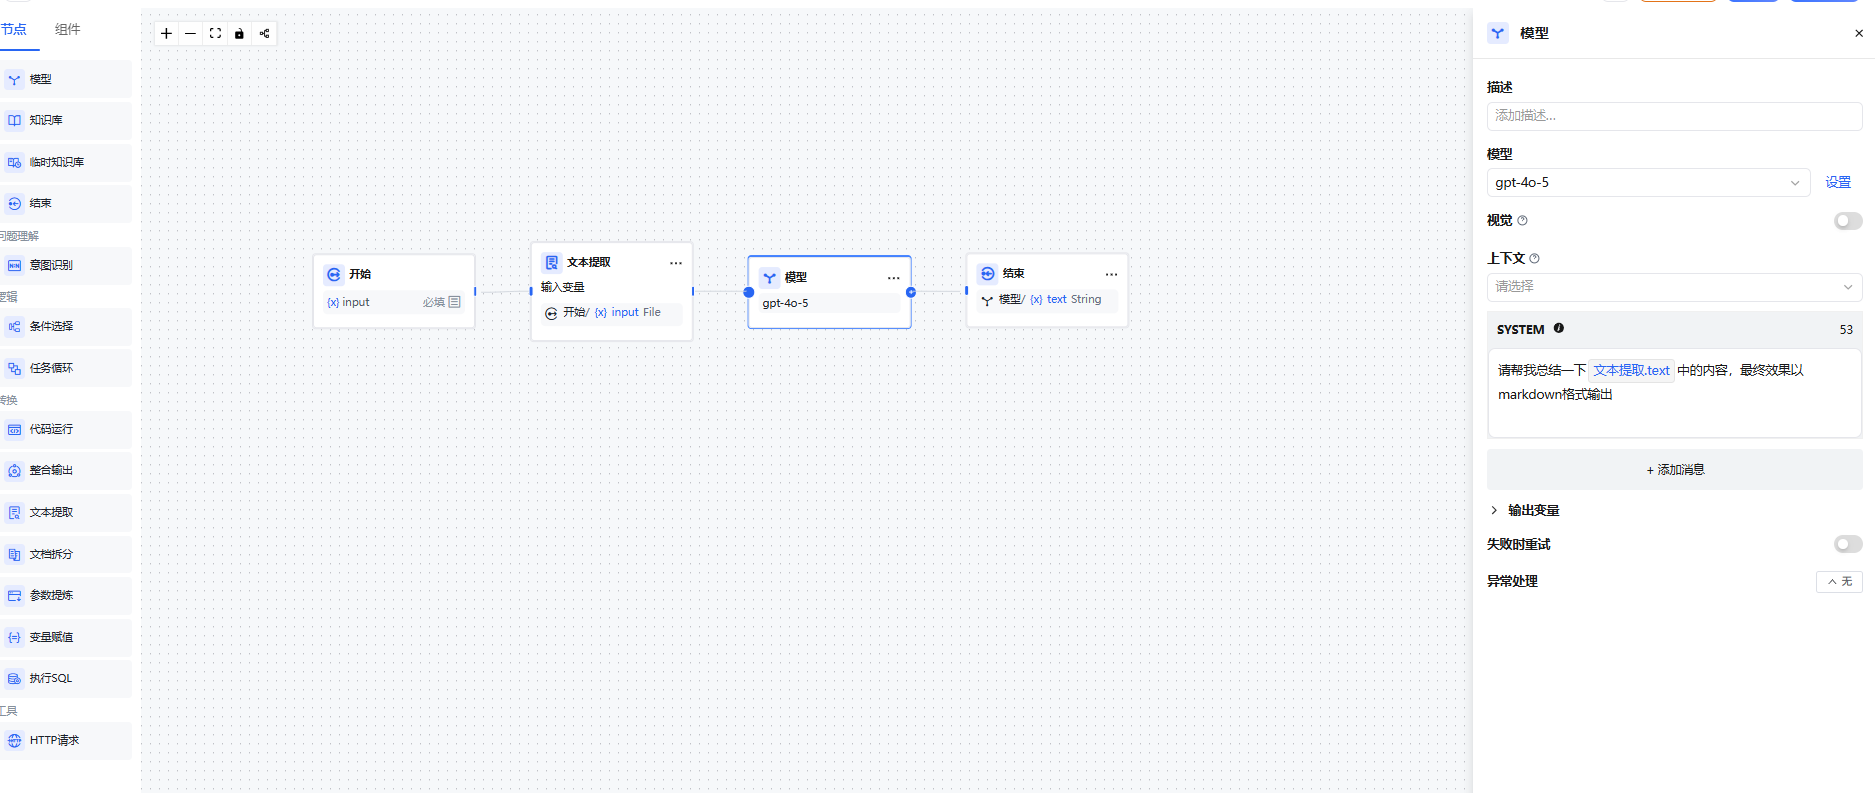
The diagram below shows the complete flow for reference at any point during the build:

Step 1: Create a Business Flow
- Go to AIGC Apps / App Center and click the "Create App" button
- Select Business Flow as the application type, fill in the application name (e.g.,
My Business Flow), and click "Save & Create" - The system automatically redirects to the workflow canvas where you can start building
Step 2: Configure the Start Node
⚠️ Keep the default values.
🚨 Give nodes and variables clear, descriptive names for easier reference and troubleshooting later.
Click the Start Node on the canvas and add an input variable in the right configuration panel:
| Variable Name | Type | Description |
|---|---|---|
input | File | The document file uploaded by the user |
Step 3: Add a Text Extraction Node
Add a Text Extraction node after the Start node to parse the document content into plain text:
- Click + after the Start node and select the "Text Extraction" node
- Input Variable: Select the
inputvariable configured in the Start node - Document Parsing Service: Select an available parsing service from the dropdown
- Image Parsing: Decide whether to enable this as needed (when enabled, images within the document can also be parsed)
Step 4: Add a Model Node
Add a Model Node after the Text Extraction node to process the extracted text with AI:
- Click + after the Text Extraction node and select the "Model" node
- Select Model: Choose an appropriate LLM from the dropdown
- Input Variable: Select the output variable from the Text Extraction node
- Prompt: Fill in the system prompt based on your business needs. Example:
You are a professional document analysis assistant. Please analyze and summarize the following document content with these requirements:
1. Extract the key points with a clear structure
2. Use conc and avoid redundancy
3. Highlight any data or conclusions

Document content: {{input}}
Step 5: Add an End Node
Add an End Node after the Model node to configure the final output:
- Click + after the Model node and select the "End" node
- Output Variable: Select the output variable from the Model node as the final result
Step 6: Debug and Publish
Debug
Click the "Debug" button in the upper right corner of the canvas. In the right debug panel, upload a test file and observe whether the flow executes as expected:
- After each node executes, input/output details are displayed to help troubleshoot issues
- If the text extraction result is empty, check whether the document format is supported
- If the model response is inaccurate, adjust the prompt content or switch to a different model
Publish
After debugging passes, click the "Publish" button in the upper right corner and select a publish option (Publish Update / Run)
Complete Flow Diagram
Start Node (input: File)
    ↓
Text Extraction Node (parse document content → text)
    ↓
Model Node (process text content → result)
    ↓
End Node (output result)
Run History
Each execution of a Business Flow generates a run record. Click the Run History icon in the upper right corner of the application to view all historical execution records, including:
- The input file and output result for each execution
- Execution details and duration for each node
- Execution status (success / failure) and error messages